QuietWarmth floor heating is suitable for luxury vinyl plank if it is 5mm or thicker. We have not tested our product under 4mm and thinner, however have known customers to add a thin “lauan plywood”. This prevents the system from getting punctured if something is dropped on thin flooring and an insulation factor from the actual flooring getting to hot.
[thrive_leads id=’1926′]
Join Our Newsletter
You are about to install your new flooring. As you lay the first plank you realize that
How do you choose the best underlayment for laminate flooring on concrete? With the various amounts of underlayment on the market, how do you know what to pick? In this article, we will go over what things you need to look for and what our recommendation is.
Moisture Protection
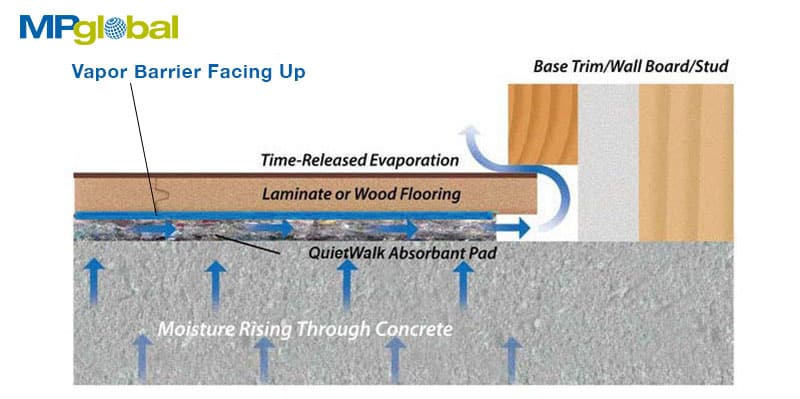
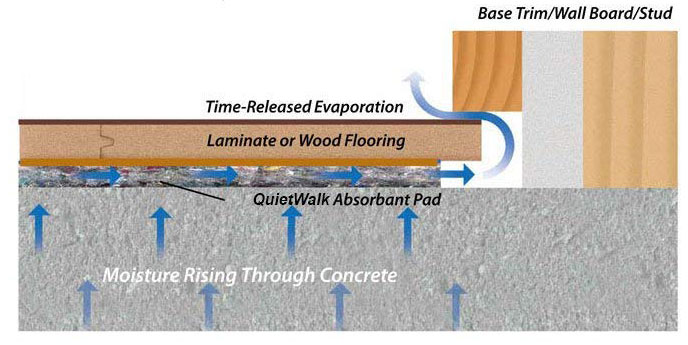
Concrete is porous and porous materials allow water to seep up into and through the flooring. This will cause adhesives to loosen, flooring to warp and mold and mildew to develop. To eliminate this concern, you will need a vapor barrier that is placed right above the concrete slab. So the first thing you want to look at does the underlayment have a built in vapor barrier? If not, you will have to look into purchasing a 6-mil vapor barrier first.
Keeping Your Floor Warm from Cold Concrete
Concrete subfloor isn’t usually warm and can make your feet nice and cold. Thermal properties of underlayment can help keep your floor warm. The thermal properties are all considered by the material the underlayment is made up of.
Foam Underlayment has R-value of 0.2-0.35
Fiber/Felt Underlayment has R-value of 0.5-0.6
Fiber/felt underlayment offers the best bang for your buck for thermal properties providing almost 200% more.
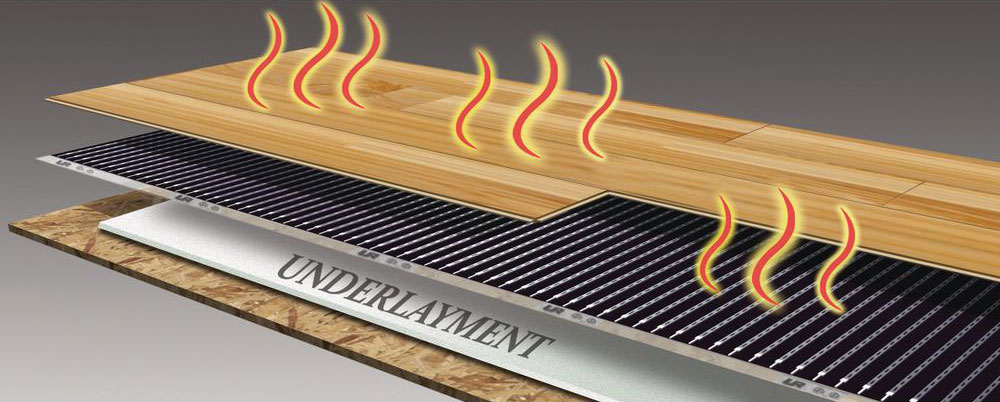
If you want more warmth, consider a radiant heat system. With today’s technology, more DIY can easily install electric floor heating system for their flooring. QuietWarmth is a popular choice as it is super thin and can be installed the same day as your flooring installation. Backed with 25-year warranty and maintenance free, homeowners consider this the easiest system to install.
Hiding Subfloor Imperfections – Your Floors Not Flat Like You Think
Another thing to consider is subfloor imperfections. Take this example:
Clearly not a good thing to hear when walking on. The main issue here is not the underlayment but the flatness of the flooring. When walking on your laminate flooring, it is bowing down and rubbing against the locking mechanism which is making that rice krispie popping sound.
It’s always best to fix the subfloor before installing any flooring. Some customers think having a new house that it shouldn’t have this issue. Home builders usually will do a good job making sure your floor is safe and acceptable level however 3/16″ difference within 10 ft can make a big difference in your floor. They are on time constraints and like to move to the next house as fast as possible.
Resistance to Flattening Floor
Once the flooring is nice and flat, consider what the underlayment material is made of and how well it handles under weight. Will the underlayment decompress over time, and leave your flooring looking flat or have small dips? Small dips can also cause the issue displayed in the video above.
Basic foam underlayment has small air bubbles which air can escape when popped with little pressure of fingers.
Dense recycled fiber structure supports the click-together mechanism and will uphold its supportive configuration under the consistent traffic of the overlying floor.
Superior Sound Reduction/Absorption
Installing underlayment for laminate flooring can help reduce the sound from traveling to other rooms. This also helps make your floor sound like real hardwood and not laminate. The extra material sandwiched between the flooring and subfloor helps reduce vibrations transmistted from room to room. Condo associations like to meet certain sound ratings when tenants install new flooring.
Taking the items above, we believe QuietWalk Plus has what your looking for:
Moisture Protection – Our recycled fibers allows over concrete to “breathe” – managing vapors from becoming bulk moisture. The attached vapor barrier protects the overlying floors from harmful moisture. If you are worried about mold/mildew, we implement anti-microbial chemical to eliminate that worry while meeting zero VOC’s. We like to present the following image to explain better how our system works.
Thermal Insulation – QuietWalk Plus has R-value of 0.58 which is 200% more than others. The recycled wool from jackets are consistent in our underlayment and explains why we have higher R-value than foam competitors.
Subfloor Imperfections – Firm and support but flexible enough to form around subfloor surface roughness, helps to cut down on extra subfloor surface prepping time. Our dense recycled fiber structure supports the click-together mechanism and will uphold its supportive configuration under the consistent traffic of the overlying floor.
Superior Sound Reduction/Absorption – Recycled fibers absorb sound and keep it from traveling to other rooms. Makes click-together floating floors sound solid underfoot. For our flooring underlayment sound ratings chart.
Hope this article explains what to look for in floor underlayment for your laminate flooring on concrete.
This really depends on the size of your room, how many windows, what year the house is. A good general rule of thumb is if you place mats all across the room, it can be equivalent to a small space heater. So if you want to know how well it heats up, place a small space heater and after an hour or two, thats what QuietWarmth can provide in your room.
The benefit of having QuietWarmth is no maintenance and no risk of space heater catching on fire.
You just purchased QuietWarmth floor heating system for floating floors and was wondering if you need to have QuietWalk? The answer really depends if you need underlayment at all.
If you are installing a laminate flooring on plywood or concrete subfloor, it is always a good idea to lay underlayment for sound absorption and moisture protection. The reason why MP Global Products recommends QuietWalk is at it is the same height as the wires attached to the mats. You are able to create “channels” to hide the cables in the floor to allow your floor to stay flat. You can go with another brand of flooring underlayment but their height might be different and you might have to create a channel in the underlayment and subfloor causing double the work.
If you choose to not have underlayment, you will have to create “channels” in the plywood/concrete subfloor to hide the cables.
[thrive_leads id=’1926′]
Join Our Newsletter
You are about to install your new flooring. As you lay the first plank you realize that
We wanted to go over how to fasten underlayment to your subfloor in this article. Before starting, we recommend you to read your flooring underlayment installation instructions.
Two Different Ways to Fasten Underlayment to Subfloor
Floating Underlayment
Most flooring underlayment is installed floating on top of your subfloor. Installers usually lay the underlayment on the floor and start installing the laminate flooring on top. There is no fastening the underlayment to the subfloor.
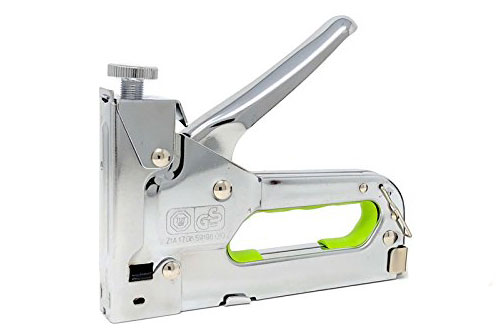
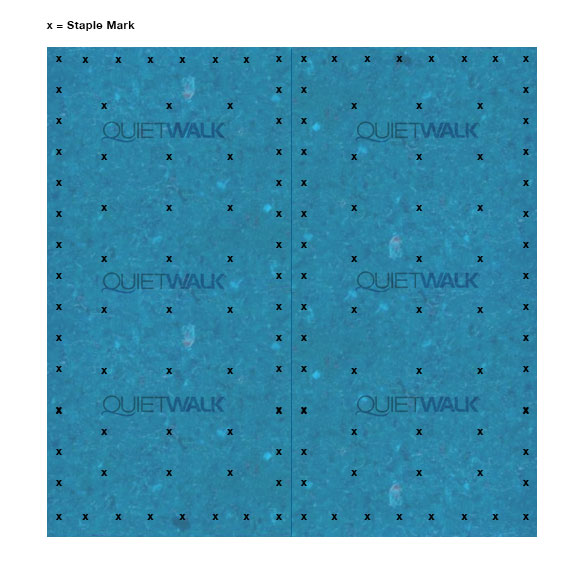
However, during installation some installers like to fasten underlayment to the subfloor to prevent the underlayment from moving. If your choose this route, staples are a good choice to fasten the underlayment. Staples usually have a coating which help increase the holding power.
Using a crown compression stapler, staple 2 inches on the seams and edges with 4-6 inches apart in the middle.
Glue-Down Underlayment
If your flooring is a glue-down flooring installation type, please refer back to your flooring manufacturers installation instructions on what they recommend for glue.
Some examples of glue in the flooring industry is Bostik’s BEST Urethane Adhesive or DriTac 5900 MegaBond.
Join Our Newsletter
You are about to install your new flooring. As you lay the first plank you realize that
All wood and concrete subfloors must be flat within 1/8″ over a 6′ span, or 3/16″ over a 10′ span. All areas must be checked prior to installation.
Installation Instructions
Be sure the subfloor surface is clean and dry*.
Roll QuietWalk Underlayment over the subfloor with the vapor barrier film (imprinted side) facing up.
The perimeter edges of QuietWalk Underlayment need to be 1/2 to 3/4 inches away from the wall.
Seams need to be butted together flush, do not overlap the pad. Tape the seams with duct tape, unless the roll is provided with a factory attached lip and tape system. 5. Install laminate flooring according to the manufacturer’s installation instructions.
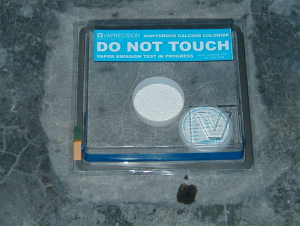
* In geographic areas where concrete slabs are subject to excessive moisture, a calcium chloride moisture test is required. Vapor emission readings in excess of 5 lbs. per 1,000 square feet in 24 hours will require additional protection such as a concrete sealant or polyethylene sheeting.
NOTE: All rolls of QuietWalk Underlayment are cut to a minimum of 100 square feet. The average thickness of QuietWalk Underlayment is .125 of an inch. The average weight of a roll is 12 lbs.
Due to the nature of our manufacturing process and the use of recycled materials, the pad thickness may vary .02 of an inch plus-or-minus. Actual weight of each roll may also vary 1.2 lbs. plus-or-minus. While it may appear that one roll is slightly larger than another, we guarantee this slight variance DOES NOT affect the coverage area nor the sound absorption benefits of the product.
Join Our Newsletter
You are about to install your new flooring. As you lay the first plank you realize that
The answer is no. We recommend to use duct tape as every hardware store carries this product. Some manufacturers sell specialized tape for underlayment but there is no extra benefit.
Join Our Newsletter
You are about to install your new flooring. As you lay the first plank you realize that
QuietWarmth follows UL standards and can be installed outside of wet locations. QuietWarmth can not however be installed in wet areas.
What is considered a wet location?
A location in which water or other liquid can drip, splash, or flow on or against electrical equipment. A wet location luminaire shall be constructed to prevent the accumulation of water on live parts, electrical components, or conductors not identified for use in contact with water.
Answer:
Yes, if you are placing the mat in front of a vanity or outside of the shower and is not consider a wet spot.
No, if you are placing the mat below the shower pan, bath tub or in a suana. Antyhing that UL considers wet location
According to our instructions, we say no because the mat can not be placed under wet areas such as shower pans and bath tubs, suanas. Anything that UL considers wet locations.
Join Our Newsletter
You are about to install your new flooring. As you lay the first plank you realize that
Economical protective covering over new floors, prior to completion
Saves time
Compatible with coal tar and asphalt-based roofing systems
Specially designed to resist bleeding
Good general purpose jobsite protective utility paper
Protection from paint overspray
Used for Plastering Projects and Landscaping
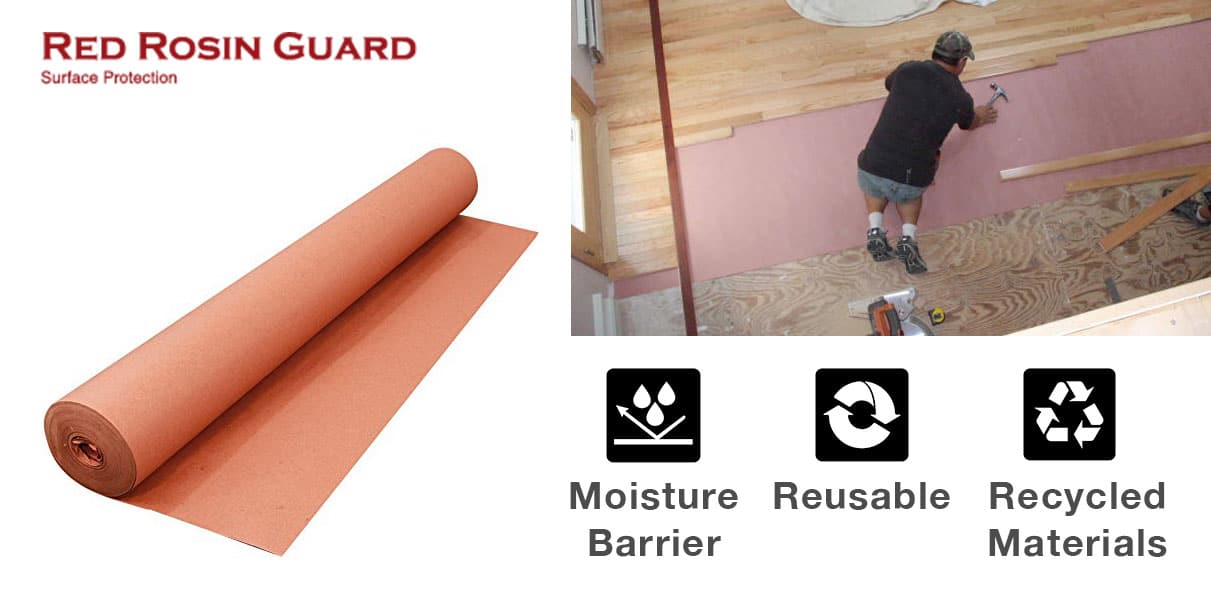
Red Rosin Paper Uses
Red Rosin Paper is useful in many construciton applications, such as roofing, flooring, jobsite protective covering and landscaping.
Roofing Industry
Roofing industry uses red rosin paper for the first layer of protection. Keeping your roofing dry is key.
Flooring Industry
Building Construction typically use red rosin paper to help reduce air and moisture flow through a wall or floor. This creates a “slip sheet” so different materials can slip by each other as they expand and contract. Keeping dust from dust from working down the floor and minimizing squeaking.
Jobsite Protective Covering
Red Rosin paper can also be used to temporarily protect a work site during construction. The paper roll help help existing floors from scratches, paint spills, etc. Red rosin is known for improving moisture resistance and tearing.
Landscaping – Weed Control
Landscapers use red rosin paper to prevent weeds from germinating. Mulch is usually applied above the paper.
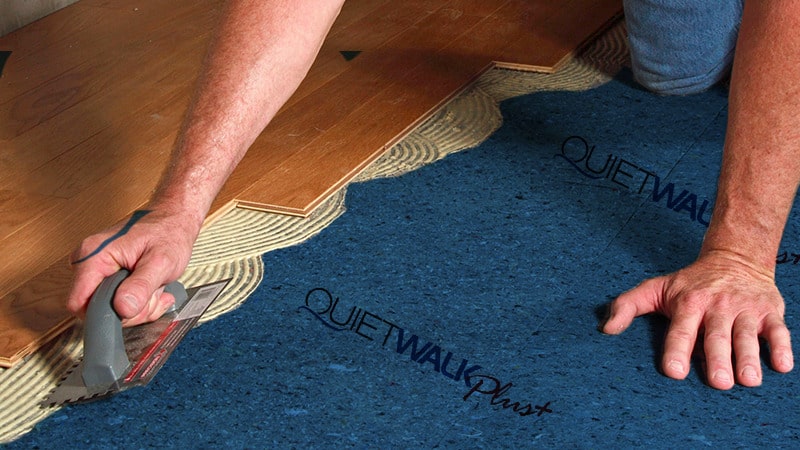
QuietWalk Plus Underlayment is designed for use with most nail, glue down and floating floor products and is flexible, easy to install and features a 1.8 mil moisture resistant top film layer. This sound reduction underlay system is suitable for use over most types of industry approved sub floors (3/4” plywood, concrete, OSB flooring, etc.). Consult with the flooring manufacturer for specific recommendations and requirements for your installation.
GENERAL INFORMATION:
Moisture: All sub-floor assemblies should be tested for moisture before installing your flooring products.
Wood subfloors: Using a species specific moisture meter (Tramex, Lingo-Mat, or Delmhorst) determine if conditions are dry before installing. Wood subfloor moisture reading must not exceed 12%; the ideal moisture content within new solid wood flooring is 6%-9%. The differential balance between the wood flooring and subfloor must not exceed 4% or 2% for board widths over 2 1/4”. If moisture readings are too high, postpone the installation, find the moisture source and correct. Raise heat and increase ventilation, holding off installation until proper conditions are met.
Concrete subfloors: Prior to installation the moisture content of concrete must be measured. Concrete must be 60 to 90 days old. Moisture testing only establishes the presence of moisture at the time of measurement. Of greater concern is future moisture transferring up through the slab into the surface, therefore the use of a moisture barrier is necessary.
CONCRETE SLAB MOISTURE TESTING METHODS
Calcium chloride test ASTM F 1869, a quantitative test used to determine the amount of moisture in the slab. The emissions of moisture must not exceed 7 lbs per 1000 sq ft, in 24 hrs for QuietWalk Plus Underlayment. Testing kits are available at most flooring tool supply distributors.
Rapid (RH) testing method ASTM F2170: a test for relative humidity within the slab. The results shall not exceed 75% at the time of testing.
QuietWalk Plus Underlayment is designed to be installed in enclosed areas where temperatures will not fall below 55°F or go above 100°F. The underlayment and adhesives must be conditioned at 70 degrees Fahrenheit with the relative humidity between 25 % and 65% for at least 24 hrs before and 72 hrs after installation. Product is NOT recommended in areas subjected to heavy rolling loads.
*In order for any isolation barrier to be effective a certain amount of compressibility/deflection is required and to be expected when installing any flooring over an underlayment. This deflection may cause mild squeaking or “floor noise”, especially in nail-down applications. “Excessive squeaking or Floor Noise” can result from; loose or unlevel subflooring or improper installation methods and is not considered a product defect.
Applications
NAIL DOWN INSTALLATION:
For Mechanically Fastened Solid Wood, Engineered Wood Floors, and solid bamboo products:
Roll the QuietWalk Plus Underlayment out with overlap edge facing your starting wall (cut off flap) and the vapor barrier film (film side) facing up, and trim to fit the perimeter of room using a sharp utility knife maintaining a ¼” gap at perimeter).
Roll out next row in same manner butting underlayment close to first row (do not overlap padding) seams should be butted together leaving no gaps or overlaps.
Remove the tape strip and secure the overlapping moisture barrier film. When cutting around obstacles or when end of roll seams are butted together tape seams with duct tape or a quality strapping tape.
Install flooring according to the flooring manufacturer’s installation instructions.
* Low profile Floors: Wood flooring products need to be a minimum of 3/8” thickness in nail down applications over QuietWalk Plus Underlayment
DOUBLE STICK INSTALLATION:
For low profile solids, engineered, and bamboo flooring. Surface must be clean, dry and free of contaminants and sealers.
Roll the Underlayment out with overlap edge facing your starting wall (cut off flap) and the vapor barrier film (film side) facing up, and trim to fit the perimeter of room using a sharp utility knife maintaining a ¼” gap at perimeter). Cut the flap off each row for this glue down application.
Use a 75 or 100 lb three section roller to secure Underlayment to substrate prior to installation of finished flooring.
Install flooring according to the flooring manufacturer’s installation instructions.
* Prior to installation of finished flooring. Due to the various subfloors in structures, please consult with the flooring manufacturer for adhesive specifications and approved subfloor recommendations. Only use manufactured recommended adhesive types for adhesion of this underlayment to substrate and flooring product to the underlayment.
* Installations over concrete: • Wood floor adhesives alone are not moisture barriers. • For the best results, do not mix adhesive products. Use moisture barriers and adhesives from the same manufacturer.
FLOATING INSTALLATION:
For installation of click together, edge-glue floating engineered wood, click bamboo, laminate (including those with attached cushions)
Be sure the sub floor surface is clean and dry.
Roll the Underlayment roll out with overlap edge facing your starting wall (cut off flap) and the vapor barrier film (film side) facing up, and trim to fit the perimeter of floor using a sharp utility knife maintaining a 1/2” to 3/4” gap at perimeter).
Seams need to be butted together flush, do not overlap the pad. Roll out next row in same manner butting underlayment close to first row.
Remove the tape strip and secure the overlapping moisture barrier film. Seal seams with duct tape or a quality strapping tape when cutting around obstacles or when end of roll seams are butted together.
Install flooring according to the flooring manufacturer’s installation instructions.
* Installations over concrete in high moisture areas (The emissions of moisture must not exceed 7 lbs per 1000 sq ft, in 24 hrs for QuietWalk Plus Underlayment. Testing kits are available at most flooring tool supply distributors) will require additional protection such as our 6 mil poly moisture barrier.
FLOATING SUBFLOOR APPLICATION:
Underlayment may be added as an isolation barrier to a free-floating plywood underlayment installation. Floating Plywood Nailing Base: Install a floating plywood nailing base over concrete to receive nail-down wood flooring:
Lay 6 mil polyethylene sheet vapor barrier over concrete substrate. Overlap seams 6 inches and seal with duct tape.
Roll the Underlayment roll out with overlap edge facing your starting wall (cut off flap) and the vapor barrier film (film side) facing up, and trim to fit the perimeter of floor using a sharp utility knife maintaining a ¼” gap at perimeter).
Seams need to be butted together flush, do not overlap the pad. Roll out next row in same manner butting underlayment close to first row.
Remove the tape strip and secure the overlapping moisture barrier film. When cutting around obstacles or when end of roll seams are butted together seal seams with duct tape.
Lay one layer of 1/2 inch thick CDX exterior grade plywood over vapor barrier leaving 1/8 inch gap between panels.
Lay second layer of 1/2 inch thick CDX exterior grade plywood on a diagonal over first plywood layer again leaving 1/8 inch gap between panels.
* Provide a minimum of 1/2-inch expansion space at the perimeter of room for normal-sized areas.
Screw plywood layers together in a 6 inch or staple pattern. Exercise care not to puncture sheet vapor barrier by using appropriate length fasteners.
Prior to installation of wood flooring, install 15 lb asphalt roofing felt underlayment.
Install flooring according to the flooring manufacturer’s installation instructions.
RADIANT HEAT SYSTEMS:
Please refer to the flooring manufactures and the radiant heat product installation instructions when installing over radiant heat systems.
QuietWalk is designed for the following applications:
Floating Laminate Flooring
Floating Engineered Wood
Floating Bamboo
Floating Rigid PVC Core Vinyl Planks
If you have a floor that needs to be glue or nail down, then we suggest QuietWalk Plus. QuietWalk Plus underlayment was engineered to be used for floating, glue down or nail down flooring applications. If you are wondering what the difference between QuietWalk and QuietWalk Plus, then this article will explain.
Another flooring underlayment for nail or glue down is Insulayment. Insulayment doesn’t offer the built-in vapor barrier for the extra protection of moisture.
Join Our Newsletter
You are about to install your new flooring. As you lay the first plank you realize that
The plastic side faces up and the fiber faces down. Two benefits are provided:
Moisture Protection
The fibers can actually allow the vapors to evaporate through the gutter system of the underlayment. The fibers are treated with a safe anti-microbial to inhibit mold and mildew.
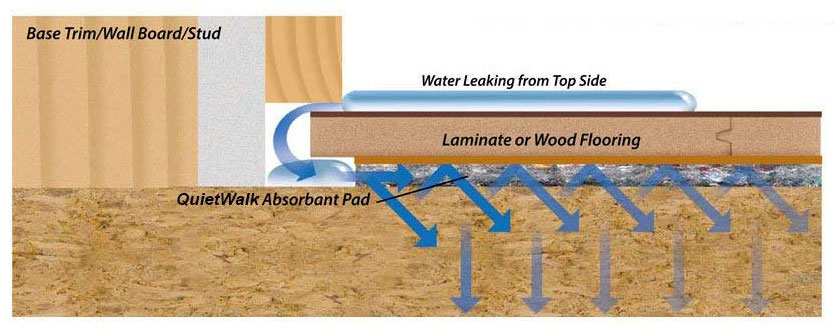
Protection from Leaks
Spills, leaky plumbing, faulty ice-makers can cause floor damage. QuietWalk underlayment fibers can absorb up to 5 times it’s own weight, drawing harmful moisture in while protecting the overlying floor.
Join Our Newsletter
You are about to install your new flooring. As you lay the first plank you realize that